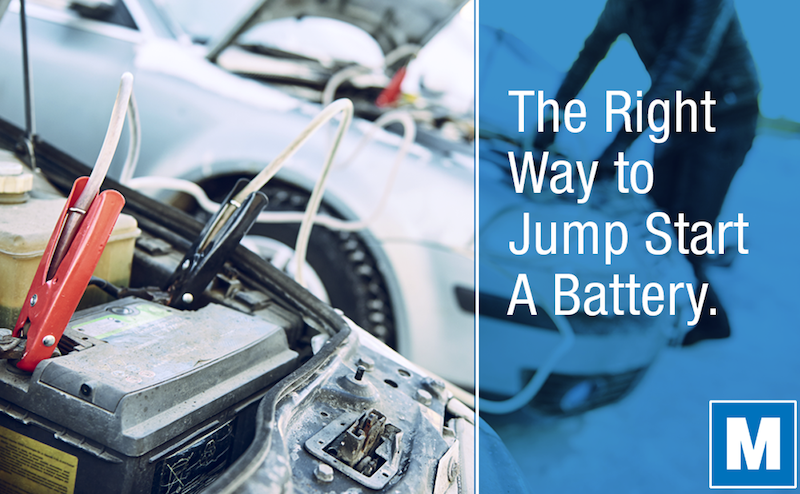
Inevitably, a car battery will fail and need to be replaced. A jump start can be a temporary solution to get you where you need to go. And sometimes, it’s a matter of user error with the lights left on or a vehicle problem that drains the battery. When the time comes to jump-start a battery, seldom is it given any more thought than connecting the cables and cranking the engine over. But there’s a correct way to do it, and several wrong ways to go about it.
Read on if there’s even an inkling that you might not be jump-starting a battery correctly, and it never hurts to brush up on a process so you’re ready the next time you need to do it.
How to Jump Start a Battery Correctly
There are two general methods that are correct for jump-starting a battery, depending if you have a portable battery pack or a second vehicle and jumper cables. The steps are similar, however, it’s important to note that they aren’t exactly the same.
Method 1: With a battery pack
A battery pack is a staple piece of equipment in automotive shops, and it’s an affordable device for vehicle owners to keep on hand too. It makes it relatively simple to safely jump-start a dead battery using the following steps:
- Make sure the battery pack is turned off. An accidental arc from connecting a battery pack that’s already turned on could damage the pack or cause an electrical problem in your vehicle like a fried module. Only turn it on once it’s connected and you’re ready to fire up the engine.
- Connect the positive cable. The positive cable, denoted by a red clamp and/or a (+) on it, is the first to be attached to the battery’s positive terminal or jump-starting access point.
- Connect the negative cable to chassis. Rather than connect the black cable to the battery, attach it to a bare metal surface on the chassis or engine. Double-check your connections to make sure they’re correct.
- Turn on the battery pack. If the battery pack or jump starter has a power switch, turn it on now. If there are any warnings or indicators, make sure they don’t indicate a problem.
- Crank the engine over. Turn the key and start the engine. Once it’s running, you may need to hold the throttle slightly for up to a minute to ensure it idles. Keep the battery pack connected for three minutes while the engine runs.
- Disconnect the battery pack. Turn off the battery pack and remove the negative clamp followed by the positive clamp. Run the engine for at least one minute, although ideally, you’d drive for a half hour or so to add battery charge.
Method 2: With jumper cables
The process of using a second vehicle and jumper cables is more common and slightly more complicated. But done correctly, you can safely jump-start a car with no issue with these steps:
- Move the booster vehicle near the battery position. Park the running vehicle near the hood so the jumper cables can easily reach between the two batteries. Turn the engine off.
- Isolate all four clamps. Throughout the process, it’s important to keep the clamps from touching each other. It could cause a dangerous arc that damages the cables, batteries, and electronics.
- Connect the positive cables. Using the red clamps, connect the positive cables – the dead battery first and the boosting battery second.
- Connect the booster vehicle negative cable. At the booster vehicle, connect the negative or black clamp to the battery terminal.
- Connect the stalled vehicle’s negative cable. For the vehicle receiving the boost, connect the negative cable to the chassis. Make sure it’s not on any part of the fuel system.
- Start the booster vehicle engine. Once it’s running, rev it slightly and hold the RPMs elevated until the recipient vehicle is running.
- Fire up the stalled vehicle. Next, start the dead vehicle. You may need to hold the throttle slightly to keep it running during the first minute.
- Remove the cables in reverse order. Run both engines for at least three minutes following the jump-start, then take the cables off in exactly the reverse order – the chassis negative clamp on the boosted vehicle, the negative clamp on the booster vehicle, then the positive clamps from each.
What Does It Look Like to Jump Start Incorrectly?
Although it’s straightforward enough to jump-start a car battery, it can be done incorrectly. When it is, you’ll typically notice immediate symptoms or consequences.
If you connect jumper cables backwards on one vehicle, or reverse the polarity, it can fry electronics and blow fuses. It’s common for costly electrical repairs to be required if this happens.
If the positive and negative clamps are touched together on one end while connected to a battery on the other, there can be a blinding shower of sparks created. The fast energy discharge can cause excessive heat in the battery, and hydrogen gas that exits from the battery can ignite.
An explosion is rare but possible if negative cable is connected to the dead vehicle’s battery rather than a chassis ground. That’s due to sparks that once again ignite escaping hydrogen gas.
Also, a frozen battery shouldn’t be jump-started. If the electrolyte is frozen inside, the battery should be thawed indoors before attempting a boost.
Attempting to jump-start a battery in any fashion other than the correct method can cause safety issues or damage to the vehicle. And a boost is for emergencies only. If you need to recharge a dead battery, don’t rely on the alternator to charge it completely. The best method is to charge the battery completely, then test it to ensure it’s healthy enough to sustain your vehicle in the future.


